
uni-icons: A Comprehensive Guide to Using Uni-app’s Icon Library
Are you a developer looking to enhance your uni-app applications with a rich set of icons? Look no further than uni-icons, the default icon library provided by uni-app. This guide will walk you through the installation, usage, and customization of uni-icons, ensuring that you can leverage its full potential in your projects.
Installation

Before you can start using uni-icons, you need to install it in your uni-app project. Here’s how you can do it:
- Visit the uni-app official website and navigate to the “uni-icons” section.
- Click on the “Download & Install” button to download the plugin.
- Open HBuilder and select the project you want to use uni-icons in.
- Click “OK” to confirm the installation. If you’re not logged in, you’ll be prompted to do so.
- Once the download is complete, you’ll see a new “unimodules” file in your project directory.
Usage

Now that you have uni-icons installed, it’s time to start using it in your project. Here’s how you can use the <uni-icons> component:
<uni-icons type="type" size="size" color="color"></uni-icons>Here’s a breakdown of the properties you can use:
| Property | Description |
|---|---|
type |
The type of icon you want to display. You can find the list of available icons in the uni-icons documentation. |
size |
The size of the icon. The default value is 30. |
color |
The color of the icon. You can specify a color value or use a predefined color name. |
For example, to display a settings icon with a size of 40 and a color of blue, you would use the following code:
<uni-icons type="settings" size="40" color="blue"></uni-icons>Customization
uni-icons is highly customizable, allowing you to tailor the icons to your specific needs. Here are some ways you can customize uni-icons:
Custom Icon Sizes
By default, uni-icons uses a size of 30 for all icons. However, you can easily change this by specifying a different value for the size property. For example, to display a settings icon with a size of 50, you would use the following code:
<uni-icons type="settings" size="50" color="blue"></uni-icons>Custom Icon Colors
uni-icons allows you to specify the color of the icons using the color property. You can use a color value or a predefined color name. For example, to display a settings icon with a color of red, you would use the following code:
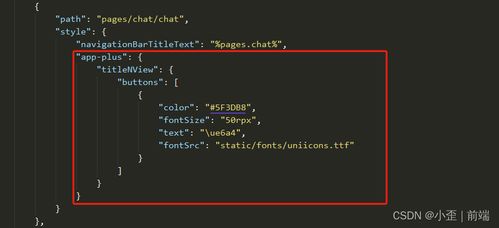
<uni-icons type="settings" size="40" color="red"></uni-icons>Custom Icon Fonts
uni-icons is built on top of a custom icon font, which allows you to easily add new icons to your project. To add a custom icon font, follow these steps:
- Download the icon font from a source like Iconfont or Google Fonts.
- Open the downloaded font file in a text editor and locate the Unicode values for the icons you want to add.
- Copy the Unicode values and add them to the
uni-icons.vuefile in your project. - Update the
font-facedeclaration in theuni-icons.vuefile to include the new icon font.
For example, to add a custom icon with the Unicode value